

While the Clover POS system remains one of the most reliable and easy to use systems we see in the market today, we wanted to put together a list of the most common questions we receive from merchants while using Clover equipment. Here are the top 8 items that our merchant support team receives in regards to the Clover POS:
1. My screen is frozen and I need to reset the device!
One of the most cliche (but still very useful) responses any support/IT team gives is the timeless “Have you turned it off and back on again?” As simple as this may sound, the reason that cliche still exists today is because it often solves whatever issue you may be having with any electronics. But what if your screen is frozen and/or unresponsive? You may notice that, while your Clover device’s back up battery was super useful when your power went out and you needed some extra time in low power mode, it can be troublesome when you want to power the device off, but can’t navigate to the restart button because the screen is frozen or unresponsive. Luckily, each device comes equipped with its own way of power cycling, though it may not be obvious how to do it.
Clover Flex – This handy little portable device has an estimated battery life of 11 hours, which is way too long to wait if you’re hoping it will restart itself when it runs out of battery. But do not worry, you can “hard reset” the device simply by holding down the power button on the right hand side of the device for 46 seconds, and then release.
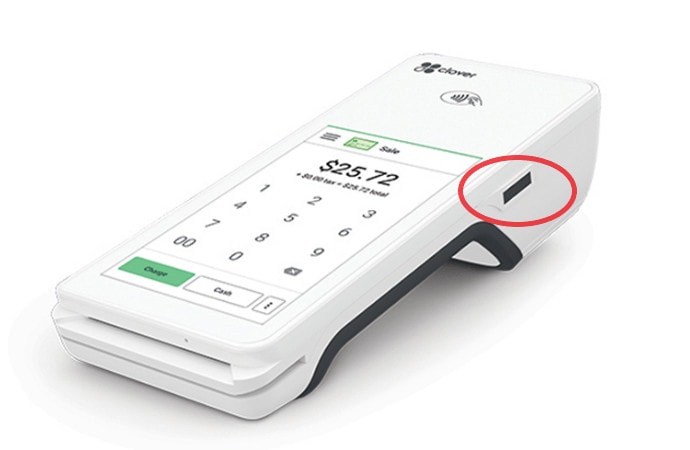
We’ve found that the most consistent way of triggering this reset is by using a stopwatch or timer app on your smartphone to help you count precisely.
Clover Mini – The back up battery in the Clover Mini won’t be nearly as long as the battery used in the Clover Flex, but you’ll still want to hard reset the device when you need a fresh restart. You may have seen this handy little restart button when loading receipt paper into the device as it is hidden away behind your printer door. Simply pop open the door and look under the receipt paper and you should see a little green button.

Press and hold this button until you see the device restart. It should only take about 10 seconds.
Clover Station – Not to be confused with the Clover Station Pro, the Clover Station has a little white power button on the bottom right hand side of the device when your display is horizontal. This is an actual button and is not on the screen itself, so look to the edge of the device, near the corner.
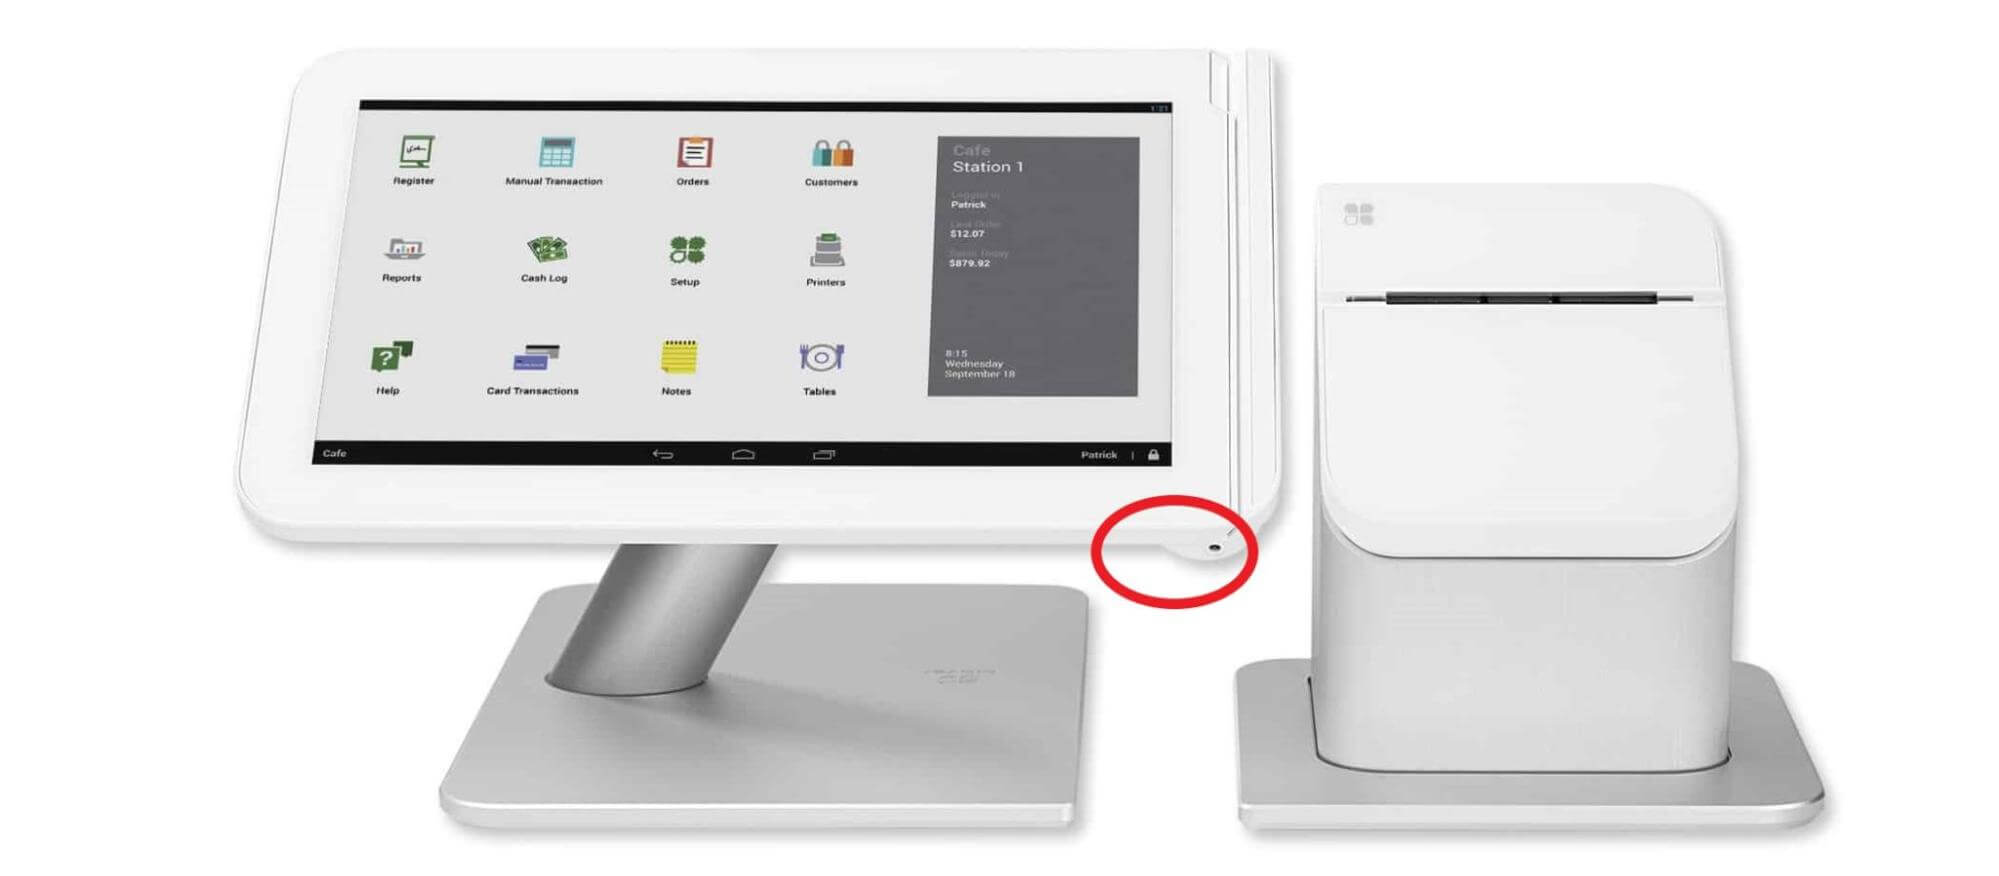
Holding down this button for around 10 seconds should trigger a restart.
Clover Station Pro – The Clover Station Pro has a printer, a display and a customer facing unit. This can be a lot when trying to figure out which piece will trigger a reset. You’ll find a small green button tucked away in the undercarriage of the customer facing device.
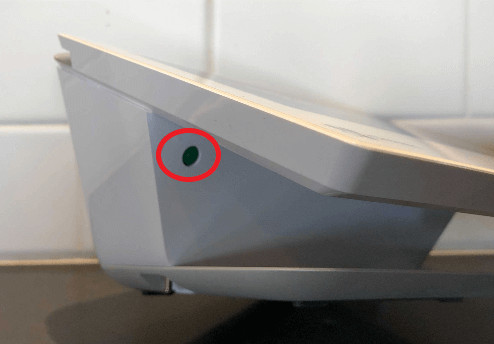
This will also need to be held down for a good 10 seconds before you’ll see a restart.
2. My Clover Flex wont turn on!
From our experience, when a Clover Flex simply won’t power on, it is usually because the battery depleted completely. Even after you’ve charged the battery back up, you may notice the power button is not turning it back on. The troubleshooting for this starts with, you guessed it… A hard reset! If the hard reset isn’t working, you may want to place the Flex on the charging dock, double check that it is securely fastened, and wait 5-10 minutes until you are confident the device has charged. Then hold down the power button on the credit card machine for 46 seconds. If it still isn’t working, your Flex may not be receiving a charge from the dock. Though it may not be ideal for your business’s everyday use, you can also charge the Clover Flex using a USB-C cable. You’ll find the port on the underside of the Flex.
3. My kitchen printer is not connected!
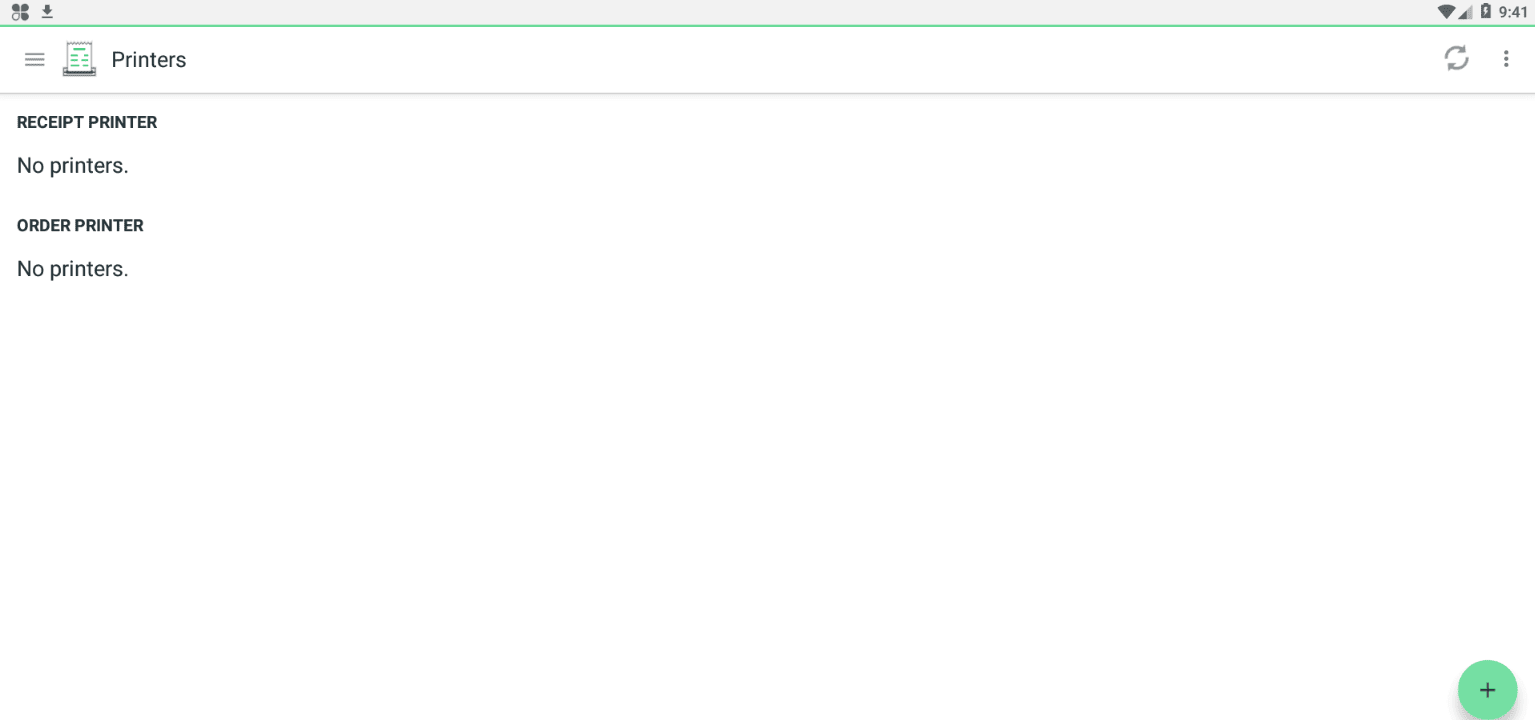
If you are wondering how to connect the printer, or your order printer simply stopped printing orders for your kitchen staff, you will first want to open up your Printer app. This will list your receipt printer, order printer, and/or your label printer. We are looking for your order printer. If you do not see an order printer at all, click the green plus button in the bottom right corner, and attempt to add the printer. If the printer is showing at all, or it’s showing but says “offline” you will want to take a look at the printer itself.
On the front of the printer you should see a little light next to the power button. If the error light is flashing red, it is having some connectivity issues. Either way, you will want to power the device off. Check and make sure the ethernet cable is plugged in tightly to the printer, as well as to your router/modem. Once the device is powered off for about 15 seconds, power it back on. Watch the light on the front of the device again. You should see it flashing red or yellow, and then finally, green once it is online.
From here you will want to go back to the Clover Printer app to see if the printer is showing. If it is still not showing, you will want to check what network your Clover device is connecting to. Remember, the printer and the Clover must be on the same network.
4. I need to add/modify a menu item!
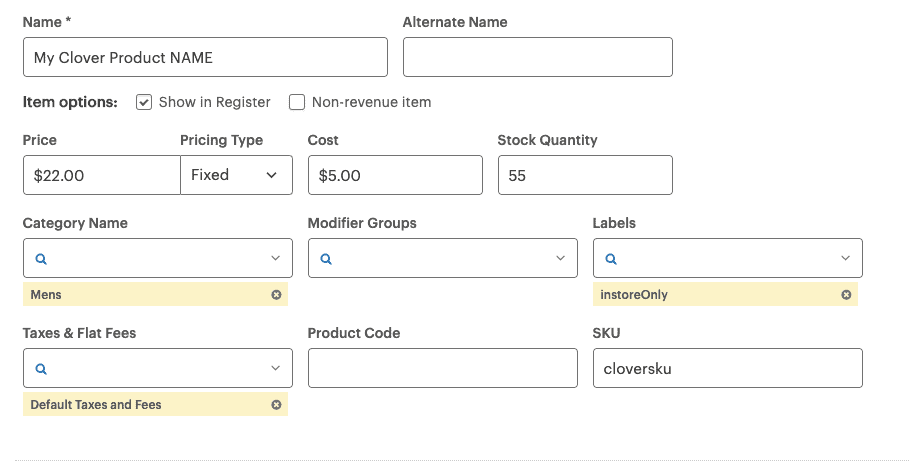
The Clover POS inventory management system keeps things simple. Just look for the Inventory app. Once the app is open, select the Items tab. You can either select the item you want to modify, or click the green plus button to add something new. From this screen, you can add/adjust the name of the item, set the price, and also select any existing categories or modifiers you want to attach to that menu item. Remember, if your order printer(s) is set to print certain items, you will want to attach the appropriate label to the item as well.
5. How do I use modifiers?
Modifiers are add-ons or modifications you would like to have available for a menu item. A simple example of this is the size of a cup of coffee. When your staff selects the coffee, you will want them to input the size as well. This can be done by creating a Group Modifier within the Inventory app.
For this example we will name the Group of modifiers “Coffee Size”. We are going to create 3 modifiers within that Group Modifier. These modifiers will be named “12 oz”, “16 oz”, and “20 oz”.
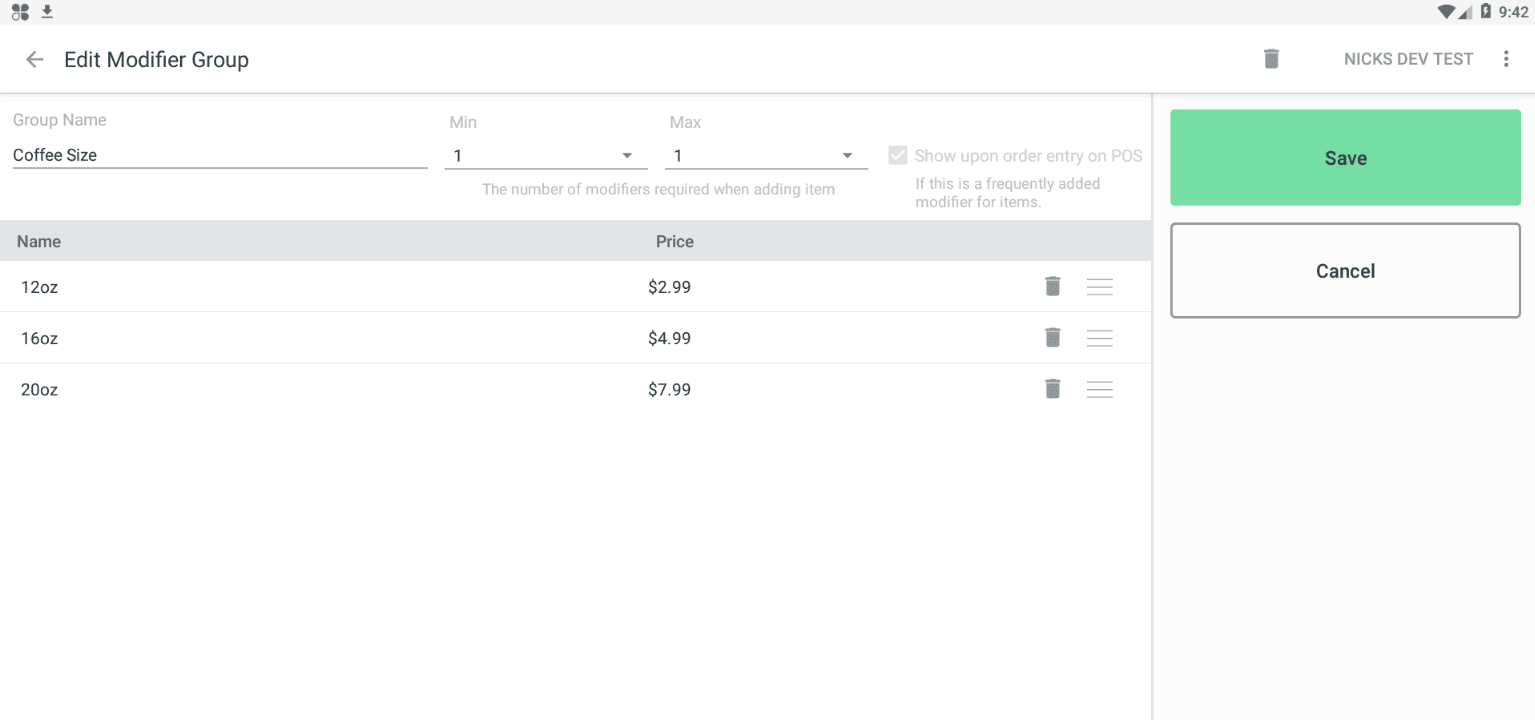
For the price, we will want to be the total amount for the cup of coffee in that size. We can also set the minimum to 1, which means in order for your staff to ring up that item, they will have to select a size for the cup. We can also set the max to 1 so that no one can select more than one size. Since the full cost is within the modifier, when creating the item, you can put the cost at zero, and simply select that mandated Coffee Size modifier for that item. Since staff will have to select a size for the coffee, each size will have it’s own individual pricing.
6. How do I add a new employee?
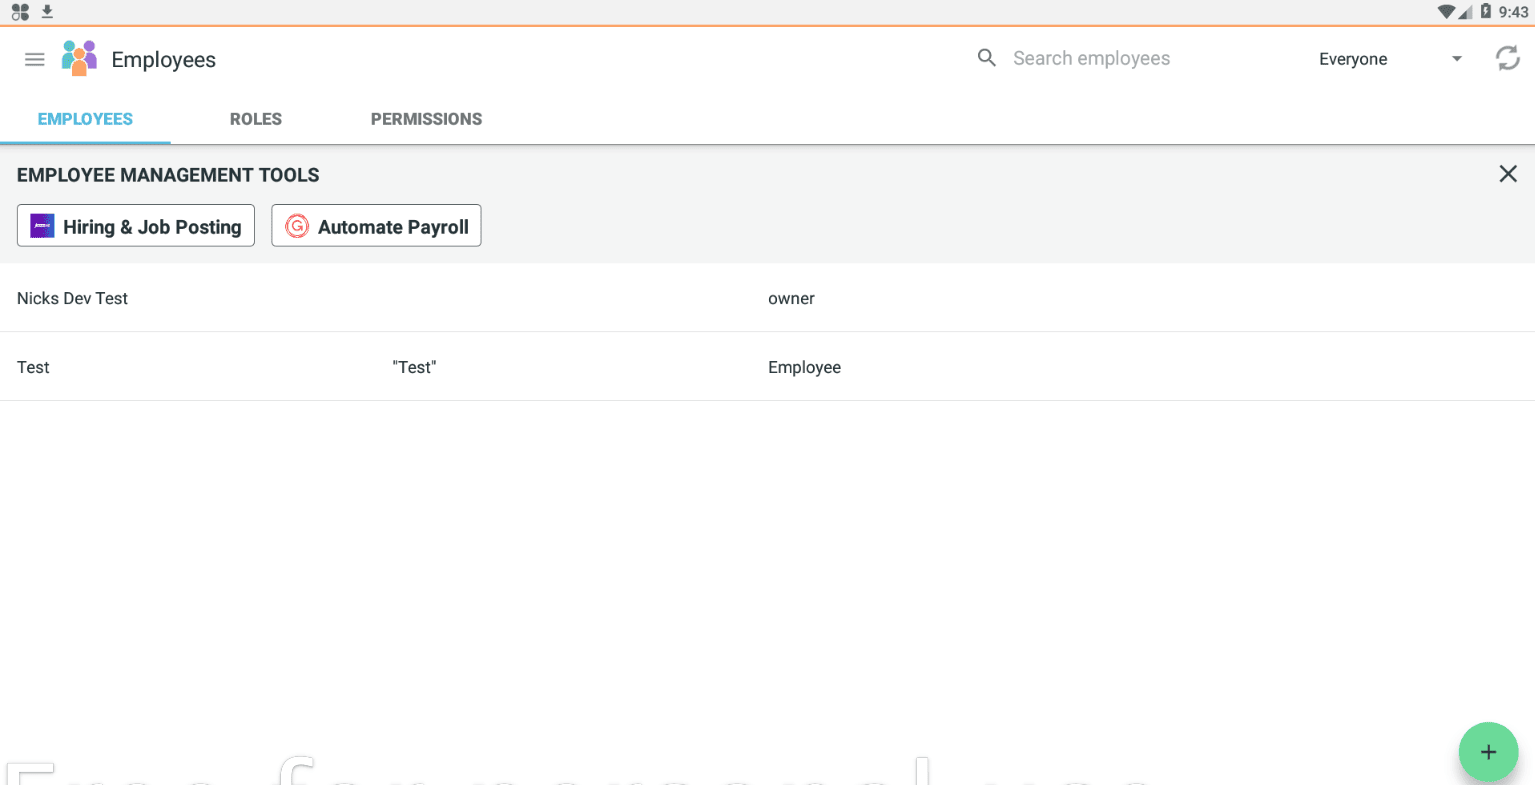
For this, we will use the Employee app. Within the Employee tab, we will select the green plus button. If you don’t see the app or don’t have the ability to add an employee, you will want to check with a manager to see if you have the permissions for this app.
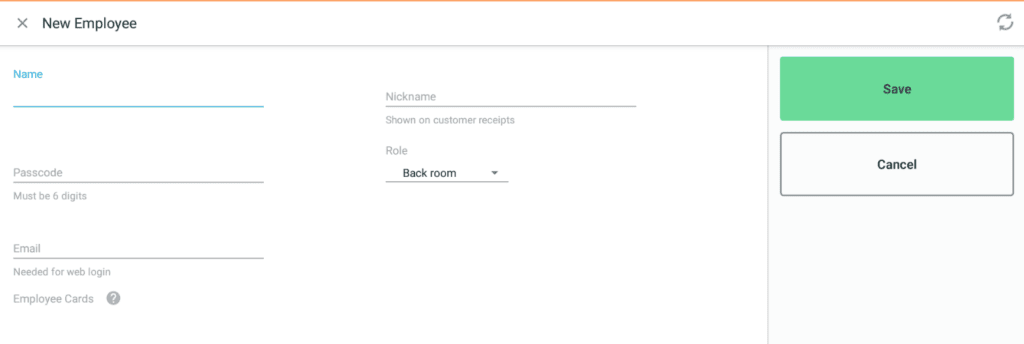
When creating an employee, you will need a name, a pin number, and a role to assign them. If you would like this employee to be able to log in to your Clover web dashboard, then you will also need to add an email address so credentials can be sent to him or her. It really is as simple as that!
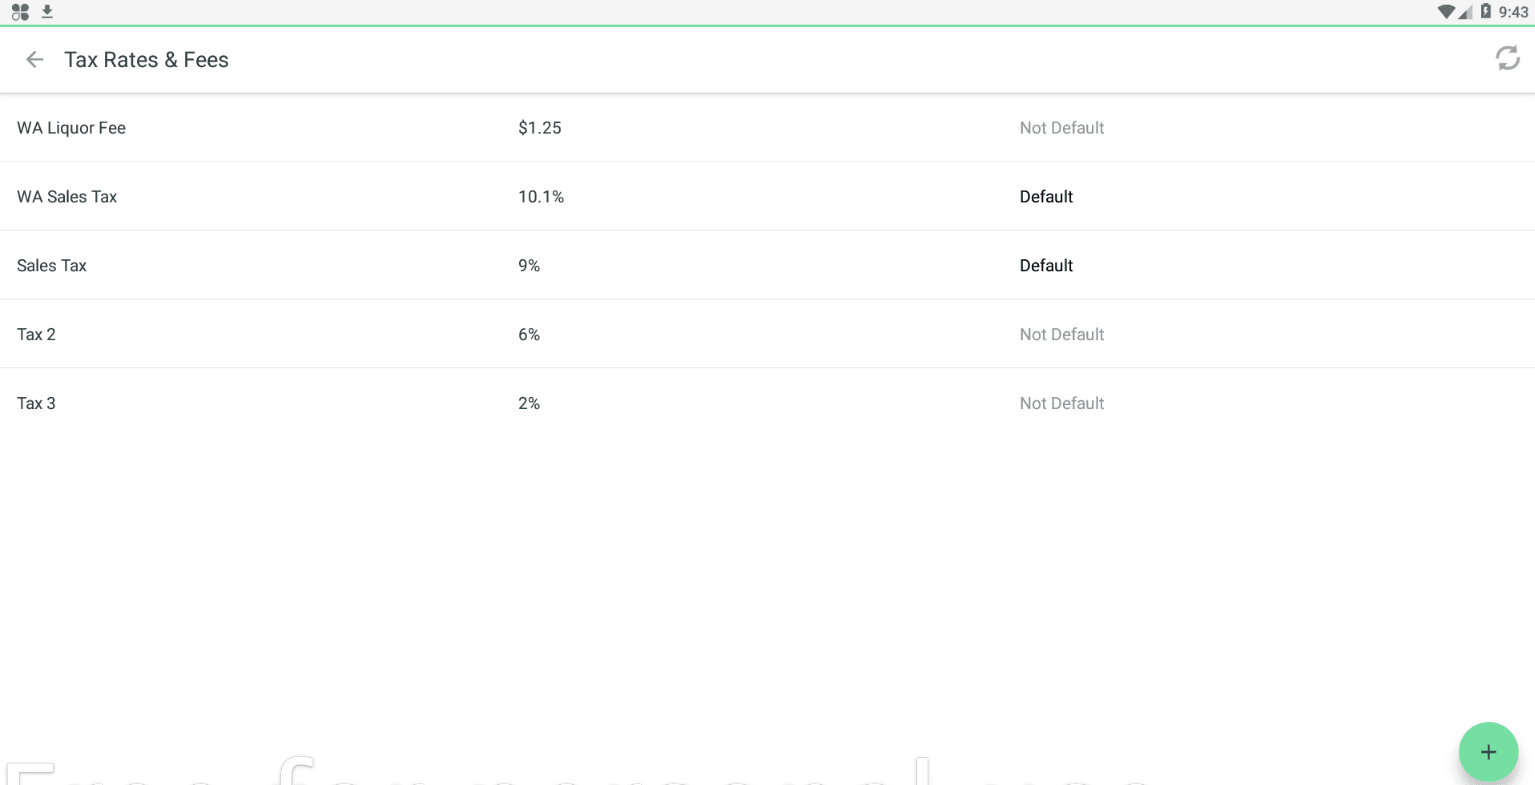
7. How do I set tax rates?
Each item within your inventory will have an option to assign a tax rate. Luckily, unless you’ve changed the setting, the item will have the “default tax rate” selected. This means that you can simply set a defaulted tax rate for your items.
To do this, you will want to select the Setup app. You should see a tab for Taxes. Here, you will select the default tax rate, and set an amount. If you would like to have a separate tax rate for some menu items such as alcohol, you can create an additional rate. When creating an alcohol item, you will select the proper tax rate.
8. My internet is down and I need to run sales in offline mode!
The Clover point of sale system has a very easy to use offline mode that will give you the ability to accept credit cards even when your device is offline. Once you have enabled the offline mode, the Clover system is smart enough to kick over into offline mode the moment your internet connection is lost. You can take a look at the settings for this within the Setup app.
When you open the Setup app, look for the “Payments” tab. Towards the bottom of the list, you should see “offline payments’. You can tap this button to adjust these settings. You can enable/disable the feature, as well as put per transaction dollar limits, offline total limits, and you can even require an approval before accepting the offline transaction.
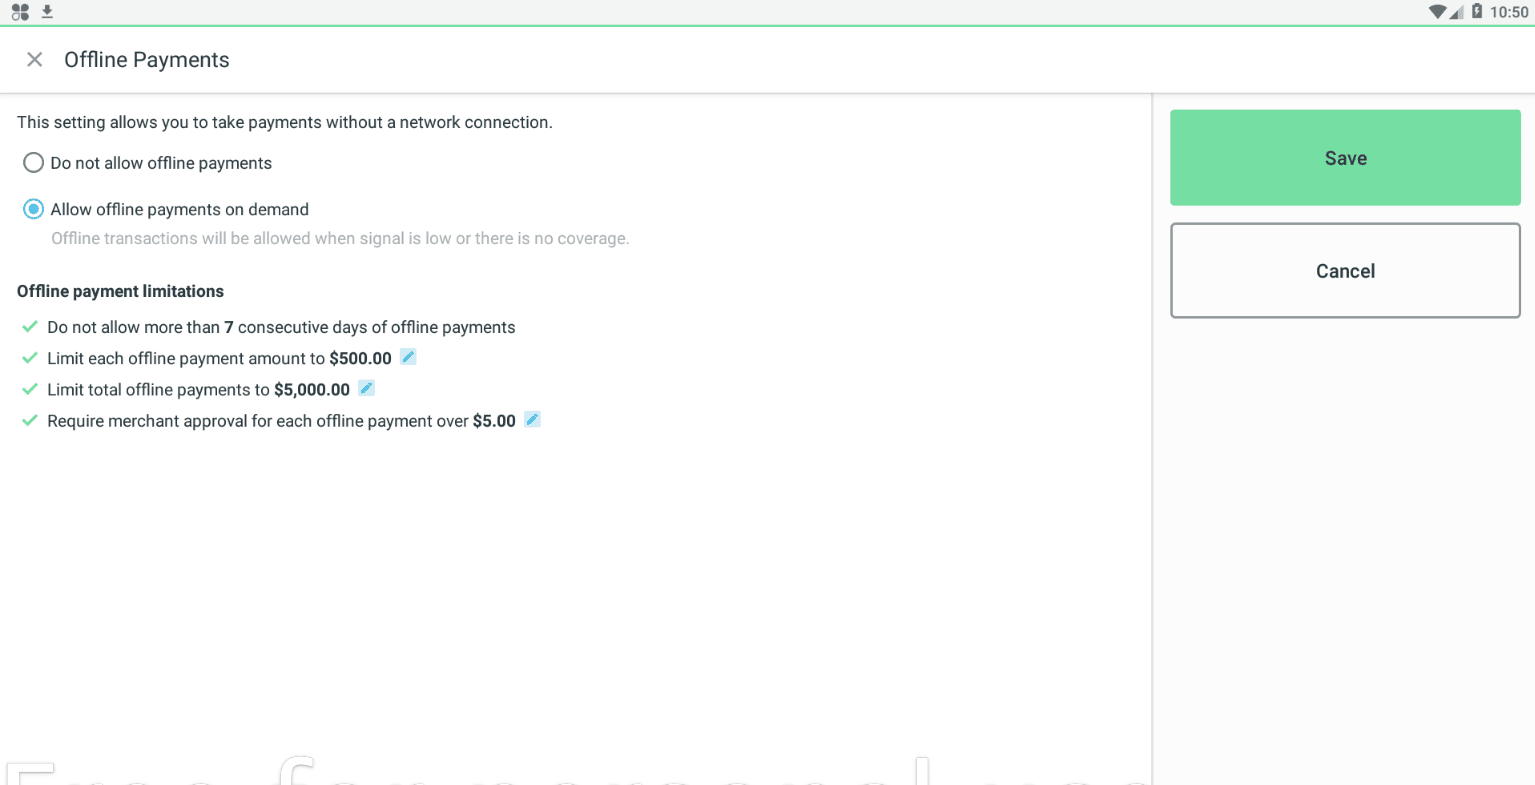
Once you accept a payment in offline mode, the Clover POS will store that transaction information until it is online again, at which point, it will automatically send the transaction off for an approval. Keep in mind that when you are processing transactions offline, the device cannot reach out to the bank for approval, so these are riskier transactions. You can track these offline transactions from the Transactions app should you need to.
Clover strives to be the POS solution for any merchant, whether you’re simply running transactions from the phone app, or have a full bar/restaurant with kitchen staff, servers and bartenders. Because of this, it can be difficult at times to know all the ins and outs of your Clover devices.
If you are currently processing with Gravity Payments and have any questions about the Clover equipment we’ve set you up with, please reach out to our support staff at 866-701-4700 or [email protected]. We’ll be more than happy to help answer any questions you may have.
If you’re not yet processing with Gravity Payments and would like to speak with a representative about what Gravity can do for you, reach us at 866-701-4700. We hope this information was useful to you! Happy processing!


